Homemade Chicken Stock Recipe — Learning to cook didn’t come naturally to me, but this homemade chicken stock recipe was a turning point. I realized how simple, soothing, and rewarding cooking from scratch could be. Making chicken stock from bones taught me patience — the gentle simmer, the comforting aroma, the rich flavor that no store-bought version can match. It’s a recipe that reminds me food doesn’t have to be perfect to be wonderful. Whether you use the stovetop or Instant Pot, this homemade chicken stock adds warmth and depth to every dish — pure comfort made in your own kitchen.
Why You’ll Love This Recipe
This recipe is proof that simple ingredients can yield something extraordinary. It’s deeply flavorful yet easy to make — a quiet kind of kitchen magic. You’ll love knowing exactly what’s in your stock: no additives, no extra sodium, just wholesome ingredients simmered with love.
It’s also the perfect way to make the most of a rotisserie chicken, using every part to create something nourishing and delicious. Once you taste your own homemade stock, you’ll wonder why you ever bought it in a box.
Ingredients (Detailed & Humanized)
- 1 rotisserie chicken (bones and skin only) – the base of your stock; adds deep, savory richness.
- 2 ribs celery, with leaves, cut into chunks – adds an earthy freshness and balance.
- 2 medium carrots, cut into chunks – gives gentle sweetness and a golden hue.
- 2 medium onions, cut into chunks – brings mellow depth and aroma.
- 2 bay leaves – infuses that classic, comforting flavor.
- ½ teaspoon dried rosemary – adds a subtle, woodsy note.
- ½ teaspoon dried thyme – for that familiar herby warmth.
- 10 whole peppercorns – gives gentle spice without overpowering.
- 8 cups cold water – the base that carries all the flavor.
- 2 tablespoons Better Than Bouillon chicken paste (or 6 bouillon cubes) – enhances depth and richness.
Directions (Step-by-Step Cooking Guide)
- Prepare the base. Remove any leftover meat from your rotisserie chicken. Save the meat for another meal and place the bones and skin into a large soup pot.
- Add the aromatics. Toss in the celery, carrots, onions, bay leaves, rosemary, thyme, and peppercorns. Pour in the cold water to cover everything. You’ll notice how vibrant the mixture looks before it even starts cooking.
- Start the simmer. Slowly bring the pot to a gentle boil over medium heat. Skim off any foam that rises to the surface — this keeps your stock clear and clean-tasting.
- Let it work its magic. Reduce the heat to low, cover partially, and let the stock simmer for at least 2 hours. The longer it cooks, the richer and deeper the flavor becomes. You’ll smell the transformation as it fills your kitchen.
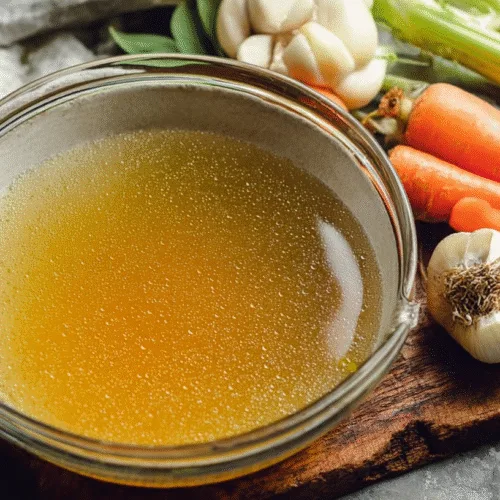
- Cool and strain. Once done, remove from heat and let it cool slightly. Strain the liquid through a fine-mesh sieve, discarding the bones, vegetables, and herbs. What’s left is your beautiful, golden stock.
- Season and finish. Stir in the bouillon paste or cubes until dissolved. Taste and adjust seasoning if needed — though this stock often shines on its own.
- Store properly. Once cooled, pour into jars or freezer-safe bags. The next time you need broth for soup or sauce, you’ll be so glad you did this.
Cultural or Technique Note
Homemade chicken stock is a timeless kitchen tradition found in cuisines around the world. From French kitchens to American comfort cooking, it’s the foundation for countless classic dishes. The technique of slow-simmering bones and vegetables dates back centuries — a way to stretch ingredients, reduce waste, and create nourishment from simplicity.
Serving Suggestions
- Use as a base for homemade chicken noodle soup
- Add to creamy risottos for extra richness
- Use instead of water for cooking grains or rice
- Sip warm in a mug as a nourishing drink
Pro Tips for Success
- Don’t rush the simmer — slow cooking draws out the best flavor.
- Keep the bones submerged for an even, balanced stock.
- Skim foam early for a clear, golden broth.
- Use cold water at the start — it helps extract the collagen from bones.
- Freeze in 2-cup portions for easy use in recipes.
- Always let it cool before refrigerating to maintain clarity.
Common Mistakes to Avoid
⚠️ Boiling too hard: It can make your stock cloudy — simmer gently instead.
⚠️ Not skimming foam: Leaves impurities in the broth — remove early.
⚠️ Too little time: A quick cook won’t extract enough flavor — patience pays off.
⚠️ Over-salting early: Wait until the end to season for perfect balance.
⚠️ Improper storage: Always cool before freezing to preserve freshness.
Storage & Reheating
Fridge: Store airtight for 3–4 days.
Freezer: Store airtight for up to 2 months.
Reheat: Warm gently on low heat with a splash of water or broth for moisture.
Frequently Asked Questions (FAQ)
Q1: What’s the difference between chicken broth and chicken stock?
A1: Chicken broth is made by simmering meat and vegetables, giving it a lighter flavor and clearer appearance. Chicken stock, on the other hand, is made primarily from bones — often with a bit of meat still attached — which release collagen and minerals during a long simmer. This gives stock its rich, velvety texture and deep golden color. When chilled, it may even gel slightly, showing just how nutrient-packed it is.
Q2: Can I use chicken stock and broth interchangeably?
A2: In most recipes, yes, you can use them interchangeably. However, chicken stock adds a deeper, more robust flavor that really enhances dishes like chicken noodle soup, risotto, and sauces where the base makes a difference. If you’re aiming for lighter flavor (for example, in quick pan sauces), broth might be the better option — but stock will always give that homemade touch.
Q3: Can I make this in an Instant Pot?
A3: Definitely! The Instant Pot makes homemade chicken stock faster without sacrificing flavor. Just add your chicken bones, vegetables, herbs, and water to the pot. Cook on high pressure for 30 minutes, then let the pressure release naturally. Once done, strain out the solids and store the clear, golden stock. It’s a perfect shortcut for busy weeknights when you still want that slow-simmered flavor.
Q4: Can I freeze homemade chicken stock?
A4: Yes, chicken stock freezes beautifully. Let it cool completely, then pour into freezer-safe containers or bags. Freezing in 1- or 2-cup portions makes it easy to grab exactly what you need for soups, sauces, or grains. It will keep for up to 2 months in the freezer, and once thawed, it tastes just as rich and comforting as the day you made it.
Closing Paragraph
This homemade chicken stock recipe turns humble leftovers into a comforting kitchen staple. Every ladle adds soul and richness to your cooking, whether you’re making soup, sauce, or simply sipping it warm. Once you see how easy it is to make and how much better it tastes, you’ll never go back to store-bought stock again. Gather your bones, your veggies, and let your kitchen fill with the cozy aroma of homemade goodness.
Final Thoughts
Making chicken stock from scratch always feels grounding to me — a small act of care that rewards you tenfold. I love that it uses every bit of a simple rotisserie chicken and turns it into something so full of life and comfort. If you try this, let it simmer while you unwind — there’s beauty in the process as much as the result. Follow me on Pinterest for more cozy, quick, and nostalgic recipes
Homemade Chicken Stock
Equipment
- Large Soup Pot
- Fine Mesh Sieve
- Ladle
Ingredients
Main Ingredients
- 1 rotisserie chicken bones and skin only
- 2 celery ribs with leaves, cut into chunks
- 2 medium carrots cut into chunks
- 2 medium onions cut into chunks
- 2 bay leaves
- 0.5 tsp dried rosemary
- 0.5 tsp dried thyme
- 10 whole peppercorns
- 8 cups cold water
- 2 tbsp Better Than Bouillon chicken paste or 6 bouillon cubes
Instructions
- Remove any leftover meat from the rotisserie chicken and set aside. Place the bones and skin into a large soup pot.
- Add celery, carrots, onions, bay leaves, rosemary, thyme, and peppercorns. Pour in cold water to cover.
- Bring to a gentle boil over medium heat. Skim off any foam that rises to the top.
- Reduce heat to low, partially cover, and simmer for at least 2 hours. Longer is better for richer flavor.
- Remove from heat and let cool slightly. Strain through a fine mesh sieve into a clean container.
- Stir in bouillon paste or cubes until dissolved. Taste and adjust seasoning if needed.
- Cool completely, then store in jars or freezer-safe bags. Refrigerate or freeze as needed.