Hi, I’m Anna. I’m 30 years old and based here in the United States, and for as long as I can remember, food has been my way of connecting with people I care about.
Tonight, I finally made that recipe I pinned months ago — the one I kept saving for “someday.” As it baked, the cozy aroma filled my kitchen, reminding me of home and quiet evenings with family. It felt like a small, happy promise kept.
If you’ve saved this one too, make it tonight and tell me how it turns out.
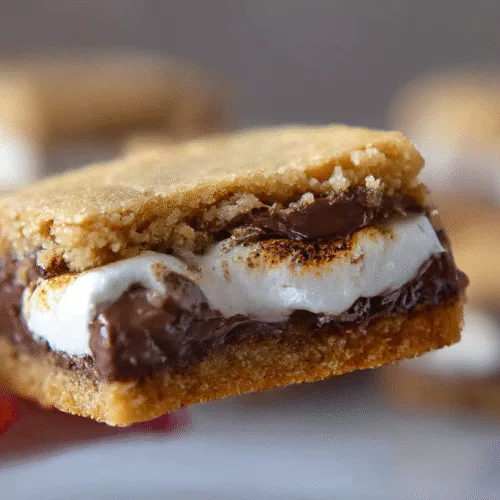
Why You’ll Love This The Best s’mores cookie bars
These cookie bars are pure comfort with none of the campfire hassle. They’re easy to make with basic pantry ingredients and bring that nostalgic flavor we all crave. They’re rich yet balanced — sweet without being overwhelming, soft in the center with a golden crisp top.
Best of all, they’re versatile. Perfect for bake sales, potlucks, summer picnics, or cozy winter movie nights. If you love different types of desserts, this one belongs in your collection.
Ingredients
- Butter – Softened butter keeps these cookie bars rich and tender.
- Brown sugar and granulated sugar – A mix for depth and sweetness.
- Egg – Adds structure and helps everything hold together.
- Vanilla extract – The warm, aromatic base that enhances every flavor.
- All-purpose flour – The heart of the cookie dough, giving it that chewy bite.
- Baking soda – For just the right lift and texture.
- Salt – Balances the sweetness beautifully.
- Graham crackers (finely crushed) – Adds that iconic s’mores flavor to the dough.
- Hershey’s bars – Classic milk chocolate for that authentic s’mores taste.
- Marshmallow crème (fluff) – The gooey, stretchy center that makes each bite irresistible.
Directions
Step 1: Make the Cookie Dough
In a large bowl, cream together the softened butter with both sugars until light and fluffy. This gives the bars their chewy texture. Mix in the egg and vanilla extract until smooth and glossy.
Step 2: Add the Dry Ingredients
Stir in the flour, crushed graham crackers, baking soda, and salt. Mix gently until the dough just comes together — no need to overmix.
Step 3: Prepare the Layers
Divide the dough into two equal halves. Press one half evenly into a parchment-lined 8×8-inch pan. Remove this layer carefully using the parchment and freeze it while you build the next layer.
Step 4: Build the Base
Line the pan with a new sheet of parchment paper. Press the remaining half of the dough evenly across the bottom to form the base.
Step 5: Add the Chocolate and Marshmallow
Layer the Hershey’s bars across the dough, breaking them to fit if needed. Then spread the marshmallow crème evenly over the chocolate — it doesn’t have to be perfect, it’ll melt beautifully in the oven.
Step 6: Seal with the Top Layer
Take the chilled dough from the freezer and gently lay it on top of the marshmallow layer. Press lightly to seal the edges without squishing the filling.
Step 7: Bake and Cool
Bake in a preheated 350°F oven until golden brown and fragrant, about 25 minutes. Let the bars cool completely before slicing — patience pays off with those clean, gooey layers.
Cultural or Technique Note
These bars capture the heart of classic American campfire desserts — a cozy twist on the beloved s’more. Baking them into cookie bars keeps all that nostalgic flavor without the mess of melted marshmallows on sticks. It’s a blend of cookie-making comfort and summertime fun all in one pan.
Serving Suggestions
Cut into Party-Perfect Squares
Slice the bars into small bite-size pieces for mini s’mores snacks — ideal for parties, bake sales, or sweet munchie platters. They’re easy to grab and always a crowd favorite.
Serve Warm with Ice Cream
For an indulgent dessert moment, serve your s’mores bars slightly warm with a scoop of vanilla or toasted marshmallow ice cream. The contrast of hot and cold makes every bite irresistible.
Mix into Dessert Boards
Arrange them alongside brownies, blondies, or cookie truffles on a dessert board. The layers of chocolate, graham, and marshmallow add visual beauty and variety to your table.
Pack for On-the-Go Treats
Wrap each bar in parchment paper and tie it with twine for an easy lunchbox or picnic dessert. They travel beautifully and stay soft for hours — no melty mess!
Cozy Pairings
Pair a square (or two!) with a cup of hot cocoa, coffee, or chai tea. The toasty marshmallow flavor tastes extra special with a warm drink in hand.
Pro Tips for Success
1. Start with Room-Temperature Butter
This ensures your dough creams smoothly, giving the cookie bars that chewy, bakery-style texture.
2. Chill the Top Layer
Freezing the top dough layer for just a few minutes makes it easier to lift and place neatly over the gooey marshmallow filling.
3. Cool Completely Before Slicing
Letting the bars rest after baking keeps the layers clean and prevents the marshmallow from oozing too much.
4. Add a Chocolate Boost
For extra richness, sprinkle chocolate chips or chunks on top before baking. They melt into the crust for a beautiful, glossy finish.
5. Don’t Overbake
Remove the bars when the edges are golden and the center looks just set. They’ll continue to firm up as they cool — that’s how you keep the middle soft and gooey.
6. Slice Smart
Use a sharp knife dipped in warm water, wiping clean between cuts. It makes every piece look bakery-perfect.
7. Flavor Twist Idea
If you want a little variation, try adding a touch of espresso powder or a sprinkle of flaky sea salt to the top — it enhances the chocolate beautifully.
Common Mistakes to Avoid
Overmixing the dough: It can make the bars tough instead of chewy. Mix just until the ingredients are combined.
Skipping the chill step: The top dough layer will be sticky and hard to handle. A quick freeze keeps it firm and easy to layer.
Cutting too early: Warm bars may collapse or smear the marshmallow filling. Wait until they’ve cooled fully for clean edges.
Using regular marshmallows: They don’t melt as smoothly as fluff and can create uneven pockets. Stick with marshmallow crème for that perfect melt.
Overbaking: The bars will dry out and lose that signature soft, gooey texture — keep an eye on those edges!
Storage & Reheating
Fridge
Store the bars in an airtight container for up to 3–4 days. Layer parchment between pieces to prevent sticking.
Freezer
To enjoy later, freeze the whole batch or individual portions for up to 2 months. Wrap each piece in plastic wrap or parchment and store in a freezer-safe container or bag.
Reheating
Warm in the microwave for 10–15 seconds or in a low oven until soft and slightly gooey again. It’ll taste like it just came out of the oven!
Frequently Asked Questions (FAQ)
Q1: How long can I keep these s’mores cookie bars fresh?
They’ll stay soft and chewy for up to 3 days at room temperature in a tightly sealed container. After that, pop them in the fridge or freezer for longer storage.
Q2: Can I freeze them?
Definitely! Wrap each bar individually and freeze for up to 2 months. When you’re ready to serve, let them thaw at room temperature — they’ll taste freshly baked.
Q3: Can I use regular marshmallows instead of fluff?
: Marshmallow fluff is ideal because it melts smoothly and stays gooey after baking. Regular marshmallows create a chewier, more set texture, but they still work in a pinch.
Q4: Can I make these easier with premade cookie dough?
Yes! Store-bought cookie dough works beautifully if you’re short on time. Just press one layer for the base, add your chocolate and marshmallow filling, and top with another layer of dough.
Q5: How do I make them extra chocolatey?
: Mix chocolate chips into the cookie dough or drizzle melted chocolate over the cooled bars. It gives them that irresistible bakery-style finish.
Closing Paragraph
These S’mores Cookie Bars are everything we love about campfire nights, baked into a cozy homemade treat. Every bite is buttery, chocolatey, and sweetly nostalgic — the perfect dessert to share with friends, family, or just yourself. Whether you serve them warm or chilled, they’ll quickly become one of your go-to recipes for gatherings or quiet evenings at home.
Final Thoughts
When I make these bars, my kitchen fills with that toasty marshmallow aroma that reminds me of summer evenings and laughter around the fire. They’re simple, comforting, and full of joy — exactly the kind of treat that brings people together.
The Best S’mores Cookie Bars
Equipment
- 8×8-inch Baking Pan
- Mixing Bowl
- Hand Mixer or Stand Mixer
- Parchment Paper
Ingredients
Cookie Dough
- 0.5 cup unsalted butter softened
- 0.25 cup brown sugar packed
- 0.25 cup granulated sugar
- 1 egg room temperature
- 1 tsp vanilla extract
- 1 cup all-purpose flour
- 0.5 cup graham cracker crumbs finely crushed
- 0.5 tsp baking soda
- 0.25 tsp salt
Filling
- 2 bars Hershey’s milk chocolate broken into pieces
- 1 cup marshmallow crème (fluff)
Instructions
- Cream softened butter with brown sugar and granulated sugar until light and fluffy. Add the egg and vanilla extract; beat until smooth.
- Stir in flour, crushed graham crackers, baking soda, and salt until dough just comes together. Don’t overmix.
- Divide dough into two equal parts. Press one half into a parchment-lined 8×8 pan. Lift it out and place in freezer to chill.
- Line the baking pan with fresh parchment and press the second half of dough into the bottom to form the base layer.
- Layer Hershey’s bars evenly across the dough. Spread marshmallow fluff over the chocolate — it’s okay if it’s a little messy.
- Carefully place the chilled top dough layer over the marshmallow. Press edges gently to seal without flattening the filling.
- Bake at 350°F for 25 minutes, or until golden brown. Let cool completely in the pan before slicing.